


Nail Art - Gel and Nail Polish
- Feb 7, 2015
- 3 min read

I bought a gel nail UV light last spring, but never really got to experimenting with it until this winter. I have tried a bit, but the first few times I have, I learned the hard way that it is a very different technique than normal nail polish.
Nail polish tricks:
1. Do as few strokes as possible ( usually 3 slow and precise stokes along the length of the nail ) as the polish will otherwise have started drying and might give a weird grumly texture; If you have a weird bump, usually, letting it dry will let it smothen over the surface of your nail;
2. Don't let the brus itself touch the nail when putting top coat; instead, just let the polish slide along the brush and cover the painted nail surface (otherwise, smudge alert );
3. WAIT. A long time, between the different layers. It is best to do the nail in two parts ( do a bit in the morning, and then go about your day, then do the end details and last polish ) if you know it'll take most f your day and don't want to rush the drying process.
4. When you want it opaque, you can paint it thick, but it'll take longer to dry. You can paint twice, but th dryin process gets longer.
UV gel nails... it's basically the opposite.
1. Don't leave too much polish on the brush, better go with many strokes and shape it exactly the way you want it, because it won't dry until you put it under the UV light;
2. If you let a bump on your nail, or a little air patch, it WILL stay exactly like that under the light. You want it to look perfect before drying it. Use Q-tips with gel cleaner to clean around the nail and don't put thick coats, because the polish might slide on each sides of the nail and make it thicker;
3. FILE. Every little defect you have, file it. Then using the cleaner, it'll make the polish look nice again after. Better file until the shape of your nail is exactly as you want, the polish is thick enough for you to take your time, and the filing doesn't ruin the design. If you file too much and lose too much color, keep shaping the nail, and just clean and put an extra layer after.
4. Wait time? 30 seconds per drying, than use a cotton pad to clean all the nails.

This is my first attempt at mixing gel and normal nail polish. Not too bad? I found that UV gel is not detail friendly, and nail polish is not lasting-friendly. So mixing both gives me best of both worlds. I put the base colors and used nail polish pens to make the details. As the detailing was not thick, I didn't have to wait long for the dry. They lasted for over 4 weeks.

Frozen Christmas Time. used lots of different stuff for this one. It was basically a test for many things I have not had the chance to use so far.
1. Base coat; gel cleaner;
2. grey-blue base color ( for the white tip, I put normal while nail polish for a try );
Index + Little Finger
3. Sparkling sky blue gel polish (I didn't dry that layer right away);
4. 3 shades of blue/purple seashell, dry;
5. top coat (1 layer, dry);
6. The shell pieces make the nail texture rough, so I filed a long time to get the surface smooth;
7. 2nd layer of top coat, gel cleaner
Thumb
3. Elsa snowflake painting with regular nail polish;
4. Sparkling sky blue gel only on the tip, not dried;
5. sea shells
6. top coat, clean, file
Ring Finger
3. UV gel that you put with an individual brush;
4. filing, because that gel is much thicker and harder to shape around the nail;
5. white dots and sparkle line with normal nail polish;
6. top coat, gel cleaner
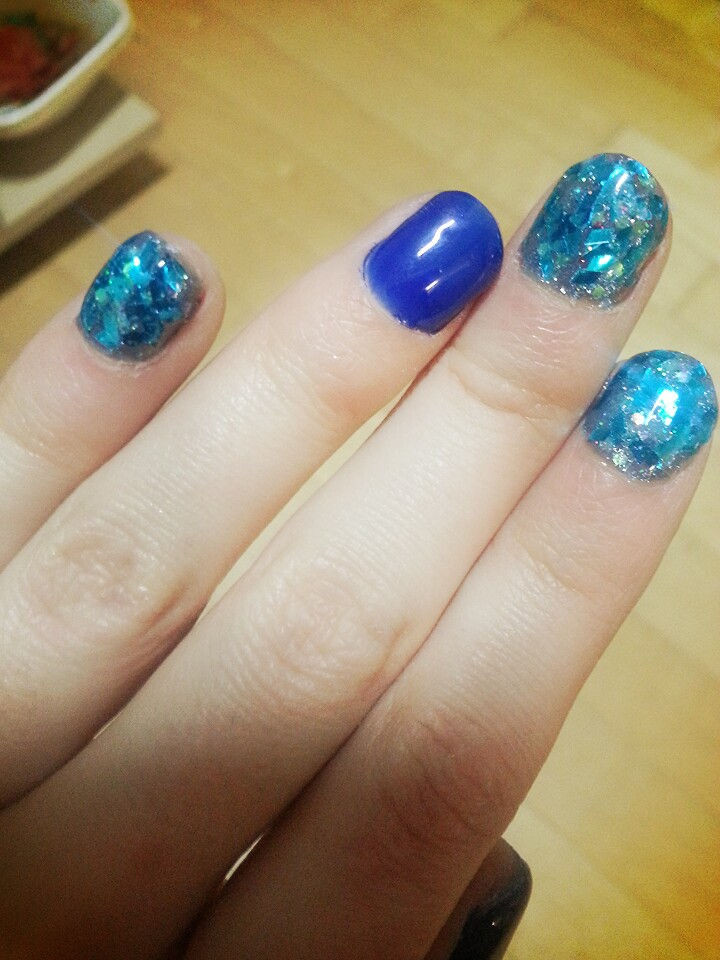
Since the sea shells worked surprisingly fine, I decided to work with sticking stuff again. Mixed three types of blue sparkles of different shapes and put them on top of the base color+shiny sky blue UV gel before drying.
Anyways, enjoying chilling with gel and nail polish :)


Comments